Glass Stringer Plate
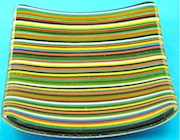
A fused glass stringer plate made from clear glass overlaid with colored glass stringers.
A fused glass stringer plate made from clear glass overlaid with colored glass stringers.
The glass is fused and then finished in a slumping mold.
It may be necessary to cold work and fire polish the plate before slumping.
This stringer plate has been made from COE 90 glass, it can also be made from COE 96 glass.
The plate dimensions can be varied to suit your kiln. Stringers can be color co-ordinated or in random colors.
Fusing Supplies:
One sheet of clear fusing glass.
Multi-colored stringers.
Glass cutter .
Shelf primer.
Fusing glue.
Glass slumping mold.
Glass fusing kiln.
Sheet of white paper.
Fine point pen.
Cutting & Assembly:
Step 1. Cut two 5 inch square pieces of clear fusing glass.
Step 2. On the white sheet of paper draw a template using one of the clear glass squares.
Step 3. If the stringers have neat straight ends lay them out to completely cover the template with one end touching a template line. If the ends are uneven place them a quarter of an inch over the line.
Step 4. Line up a glass square with the template and draw a line down the stringers, move the square slightly to mark the short overhang if needed.
Step 5. Remove the glass and cut the stringers to size.
Step 6. Place some fusing glue on opposite edges of a glass square, lay a stringer down each edge, this will be the guide for adding all the stringers.
Once the glue has dried, begin to place the stringers until the square is filled and no more stringers will fit. Adjust lengths to ensure the stringers are flush with the ends by cutting if necessary.
Step 7. Run a line of fusing glue across the stringers on each side, the glue needs to run between the stringers and down onto the glass square.
Step 8. When the glue has dried, gently grasp the edges running parallel to the stringers, carefully turn the plate over and place it on a primed kiln shelf (do not use fiber paper or thin fire paper) with the stringers facing down.
Place the second square of fusing glass on top of the first square.
Step 9. Place shelf in glass fusing kiln.
Fusing Schedule:
(May be varied to suit project size and kiln type.)
1. 400°F (222°C) up to 1225°F (663°C) hold 45 minutes
2. 600°F (333°) up to 1480°F (804°C) hold 10 minutes
3. AFAP* down to 960°F (516°C) hold 60 minutes
4. 100°F (56°) down to 700°F (371°C)
5 AFAP down to 70°F (21°)
(AFAP* as fast as possible)
Slumping:
Step 1. Remove from kiln at room temperature. Check for uneven edges and cold work with abrasive pad or glass grinder. If required fire polish before slumping.
Step 2. Place glass stringer plate in slumping mold, stringers uppermost, and put in glass kiln.
Slump using the following suggested schedule or your own schedule::
1. 300°F (167°C) up to 1225°F (663°C) hold 5 minutes
2. AFAP down to 960°F (516°C) hold 60 minutes
3. 100°F (56°C) down to 700°F (371°C)
4 AFAP down to 70°F (21°C)
Remove from glass fusing kiln at room temperature and you should have a nice fused glass art plate.
Return From Glass Stringer Plate To Glass Fusing Projects
Return To Home Page


