|
Single Strand Bracelet Stringing Tutorial
Once you are comfortable with this method you will find it easy to make multi strand or elastic bracelets. Using crimps to complete your project is the same technique you will use to make necklaces or earring dangles. All we are going to do is to fasten one end of the beading cable, thread on the beads and fasten the other end. The toggle clasp will be attached with jump rings. For this you will need the following: Beadalon or Softflex 19 strand cable Glass Beads 2 Crimps 2 Jump Rings 2 Seed or Small Beads 1 Toggle Clasp Chain Nose Pliers Crimping Pliers Side cutters Firstly, measure around your wrist; if, for example it is 7 inches cut a piece of cable at least 8 inches long. Lay your beads out on the inner circle of a beading tray if you have one. Check the length against the scale and arrange the beads in your desired pattern.
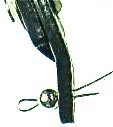
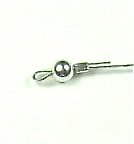
Slide a crimp onto the cable; I like to then place a small bead after the it so that it will be between the crimp and the clasp. I do this on both ends. This will prevent the crimp from rubbing and possibly wearing through. Loop the cable and thread it through the bead and crimp. Using the rear opening on your crimping pliers squeeze the crimp shut. Move the crimp to the first opening, squeeze again and it should form into a ball shape. If you don’t have crimping pliers use your chain nose pliers.
You can either trim the cable against the crimp or leave some excess cable and thread it through the first bead.
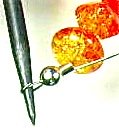
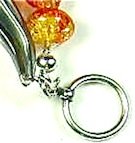
Thread your beads onto the cable; use a bead stopper, a Bulldog paper clip or piece of tape to hold you beads in place. Drape the beads around your wrist, if you’re happy with the length you can then the end. It can sometimes be a bit tight finishing off this end. As per the photo use an awl or some other tool that will allow you to pull the loop tight. Once you have the loop to the desired size you can them fasten the cable as per the instructions for the other end.
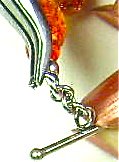
Pass a jump ring through the loop and connect your clasp chain to the cable. When using toggles you may need a small length of chain on the bar end. If the beads are too close to the toggle bar you can find that the bar will not go through the toggle ring.
Attach the toggle ring on the other end. Close the jump rings on both ends and you are finished. You don’t have to use jump rings you can pass the cable through the clasp if you like. I personally prefer jump rings, as it is an easier method.
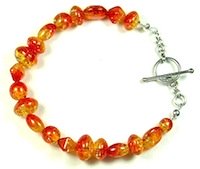
There you are a crackle bead bracelet. That wasn’t too hard was it? You now have the basic knowledge you need to go on to more challenging projects.
|


