Make A Low Fire Decal
Fused Glass Pendant
How to make a low fire decal art glass pendant fired in a glass fusing kiln. The base layers are first first fully fused with softly rounded edges, then an image is applied and the pendant is re-fired at a lower temperature.
Low fire transparencies are fired at below fusing temperature to prevent the image burning away as no clear cap is applied to the pendant.
These decals come in black and white and colored versions, many of the decals used on ceramics are suitable for glass fusing. It can be a matter of trialling different brands to ensure they do not burn during the firing process.
Due to the transparency of the image, it must be applied to a light colored surface such as white. You can experiment with this as some colors may enhance the image colors.
Dark colors are generally not suitable as some of the image details will be lost in the dark background.
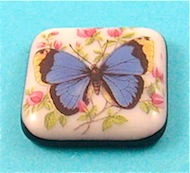
This pendant has a black base fused to a white upper layer.
A colored butterfly decal has been selected for this project.
Material List:
- Two pieces of fusing glass, black and white.
- Thin fire paper or primed shelf.
- Cutter.
- Low fire decal.
- Fusing kiln.
Fusing Instructions:
1. Select image and measure, do not cut from sheet. Transfer measurement to the glass and cut two pieces slightly smaller.
2. Wash and dry pieces thoroughly. Using primed shelf or thin fire paper stack the white piece on top of the black on the shelf.
Put shelf into kiln.
3. Bring temperature up gradually to about 1490° F (810° C).
If using thin fire paper keep kiln vented until the binders burn off and then close vent.
Hold at around 1490 F temperature and watch for edges to soften and become rounded.
Temperature may need to be adjusted to achieve the desired outcome.
4. Switch kiln off, vent kiln and allow temperature to drop to about 1000° F (540° C). Close kiln and cool to room temperature.
5. When kiln has cooled remove pendant from kiln. Measure item again, it may have spread slightly.
Cut decal from sheet and trim to size. Follow the instructions and apply the image to the pendant.
Leave decal to dry for 24 hours.
6. Put low fire decal item on prepared shelf and place in kiln. Bring temperature up gradually to about 1300° F (700° C) hold for 10 to 15 minutes.
Check decal during this time, when edges of decal have disappeared the fusing is complete.
7. Turn off, let cool to room temperature.
Use sandpaper to roughen rear of pendant, apply bail with two-part epoxy.
Return From Low Fire Decal Pendant To Glass Jewelry Projects
Return To Home Page


